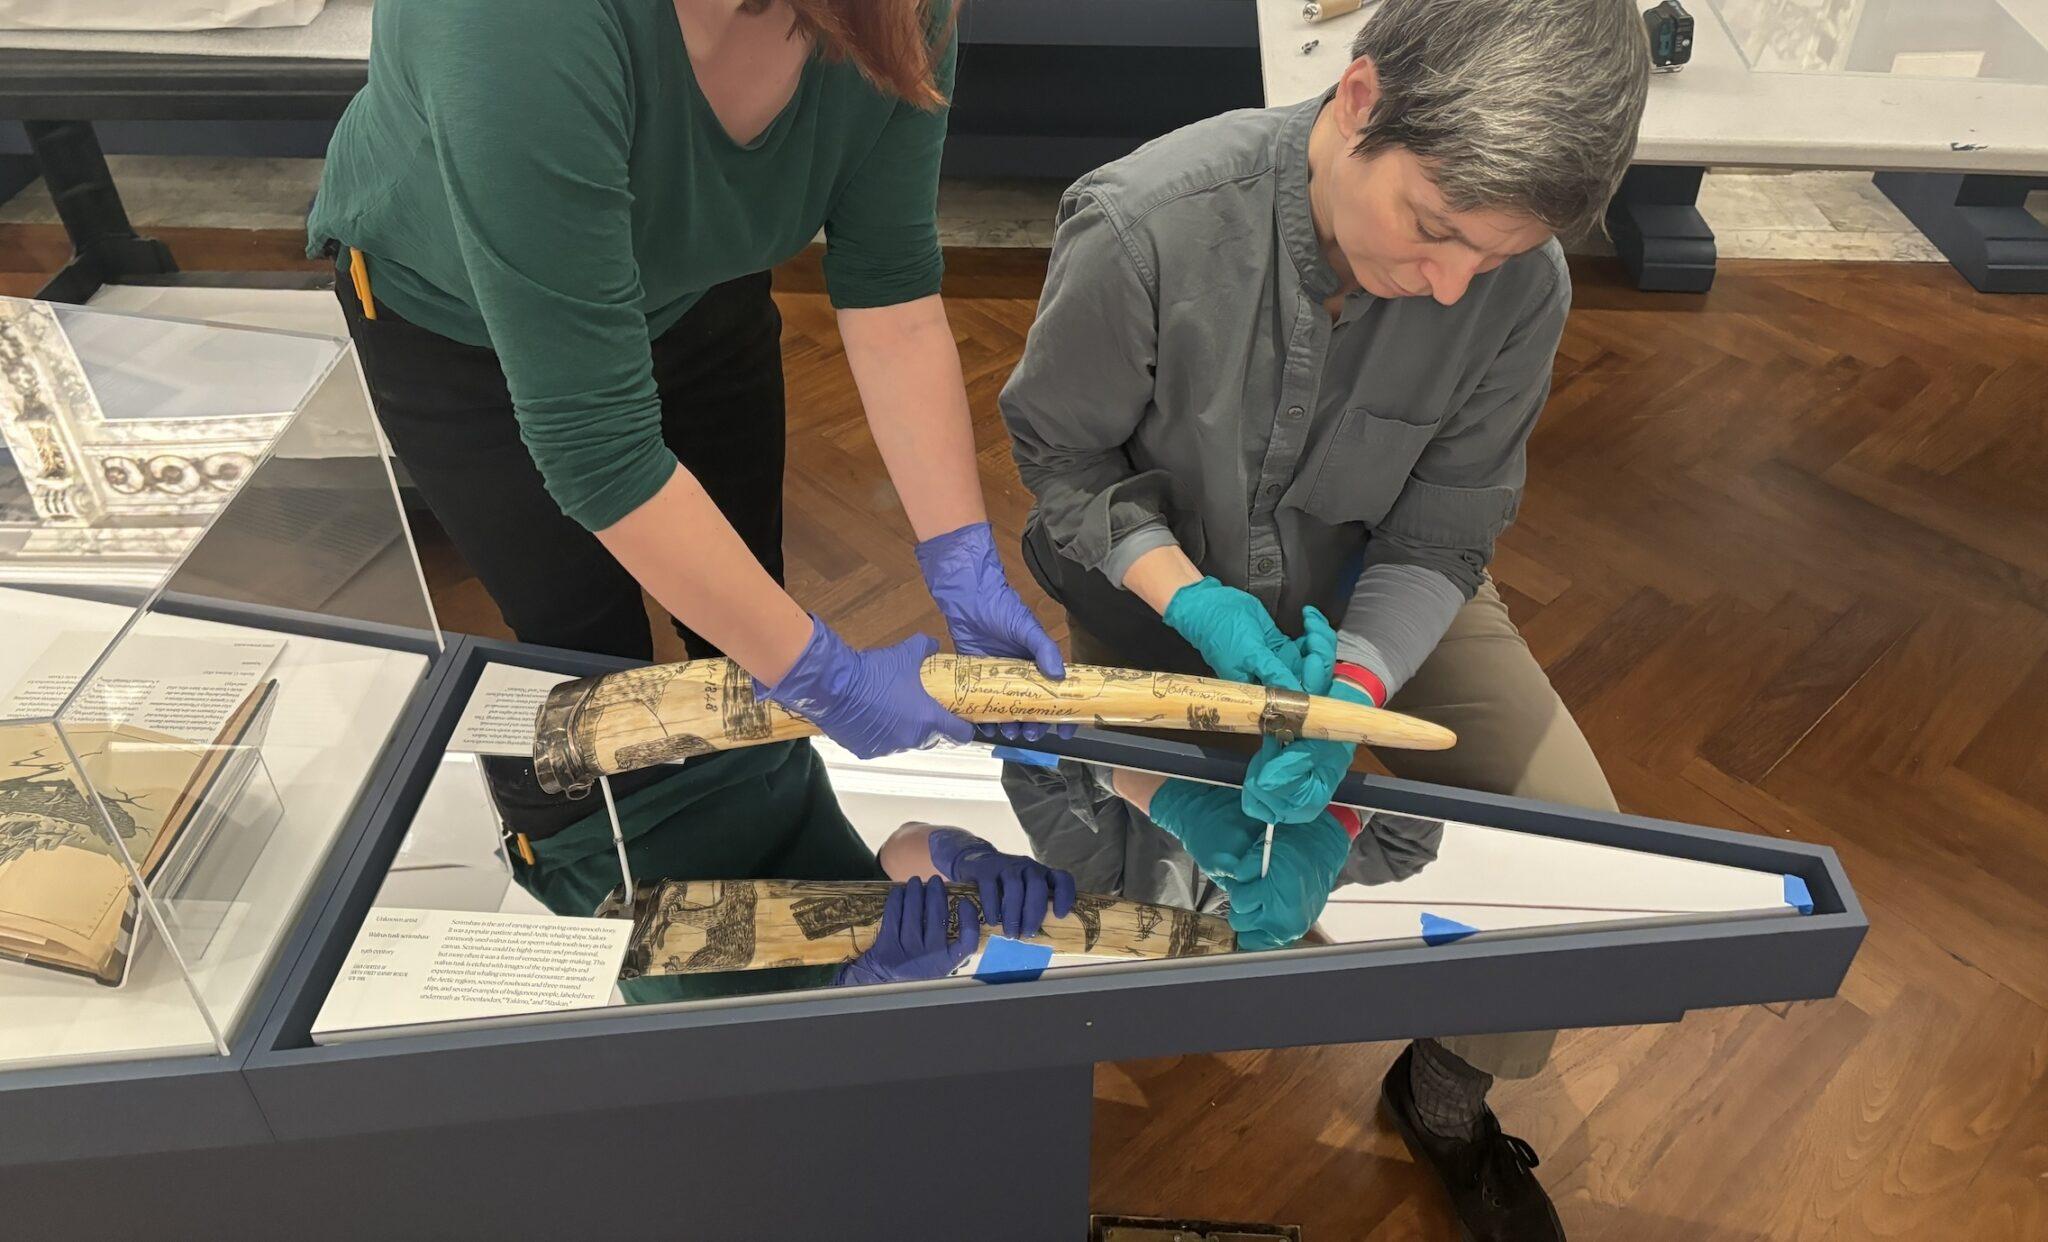
Mount making for museum collections
A Collections Chronicles Blog
By Carley Roche, Associate Registrar
May 16, 2024
Throughout my undergraduate, graduate, and floating around years I worked full-time in the restaurant industry. My roles typically fell under the category of “front-of-house” where I directly interacted with the guests as a server or hostess. I would not have been able to do my job without an incredible support staff. These are the restaurant workers who clear and reset the tables, bring hot food to the guests, restock supplies, and clean the dishes, silverware, and glassware—work that generally goes unnoticed. This unseen support allows the “front-of-house” to look good and meet the expectations of both the guests and management.
Now that I am working as a museum professional, I see a lot of similarities with my time in restaurants, including this unseen support system. In cultural institutions that display objects, it is important for objects to be displayed prominently, in an engaging manner, and, most importantly, safely. To meet these expectations, museums and other institutions utilize mounts. These are structures that physically hold an object put on display and whether you have seen them or not you have experienced the success of their work anytime you have gone to see an exhibit.
In this blog post, I will discuss how object mounts come to be—from the initial design to the final installation. There are many steps to create these important unseen supports, which allow objects to be impressively and safely displayed for audiences to enjoy.
Considering my career choice, it should go without saying that I enjoy visiting other cultural institutions. While seeing many different wonderful exhibits on display, in recent years I have found myself looking more closely at the mounts. They are designed to be unseen as much as possible, while at the same time highlighting objects so the visitor fully engages with the artifact.
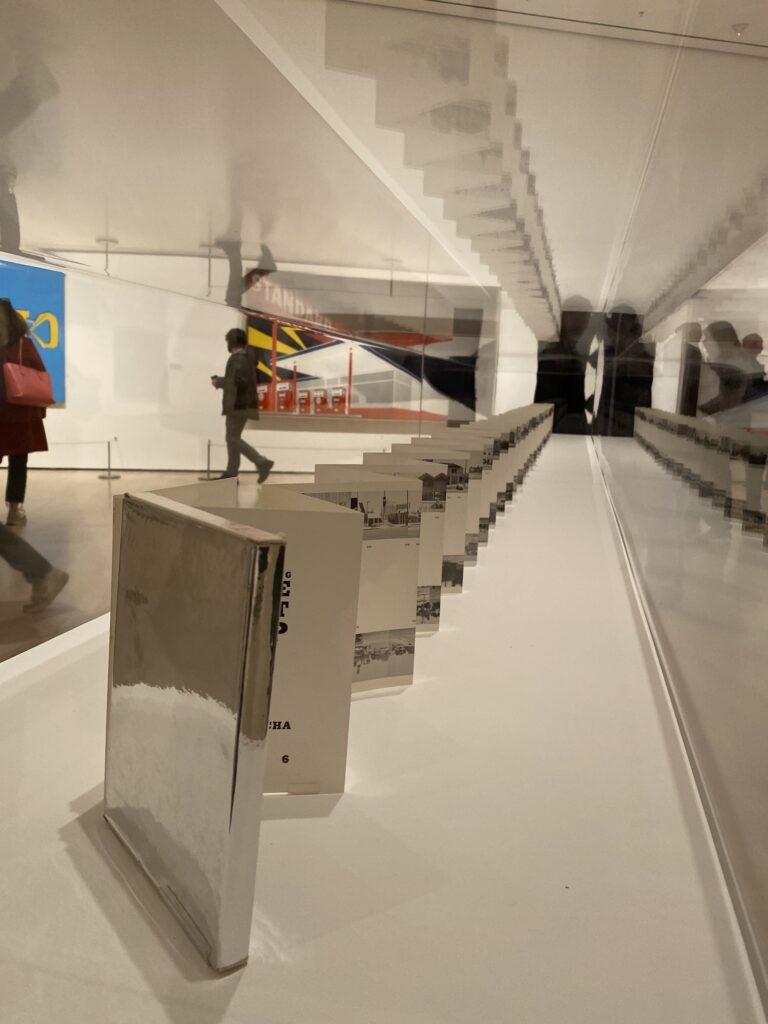
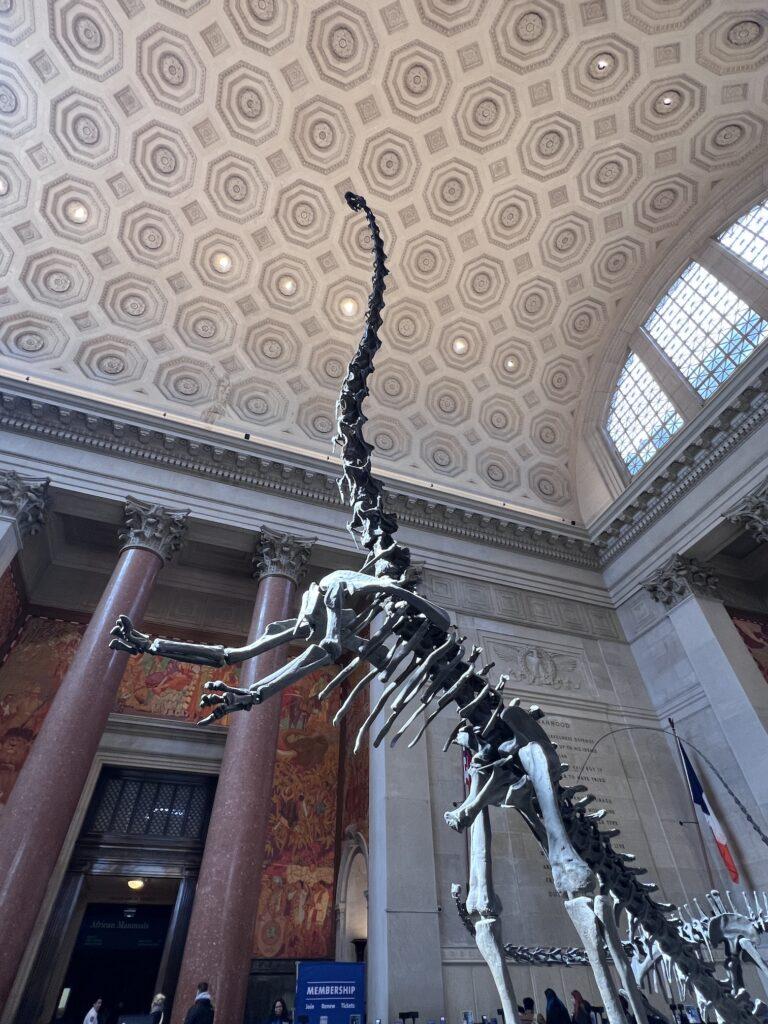
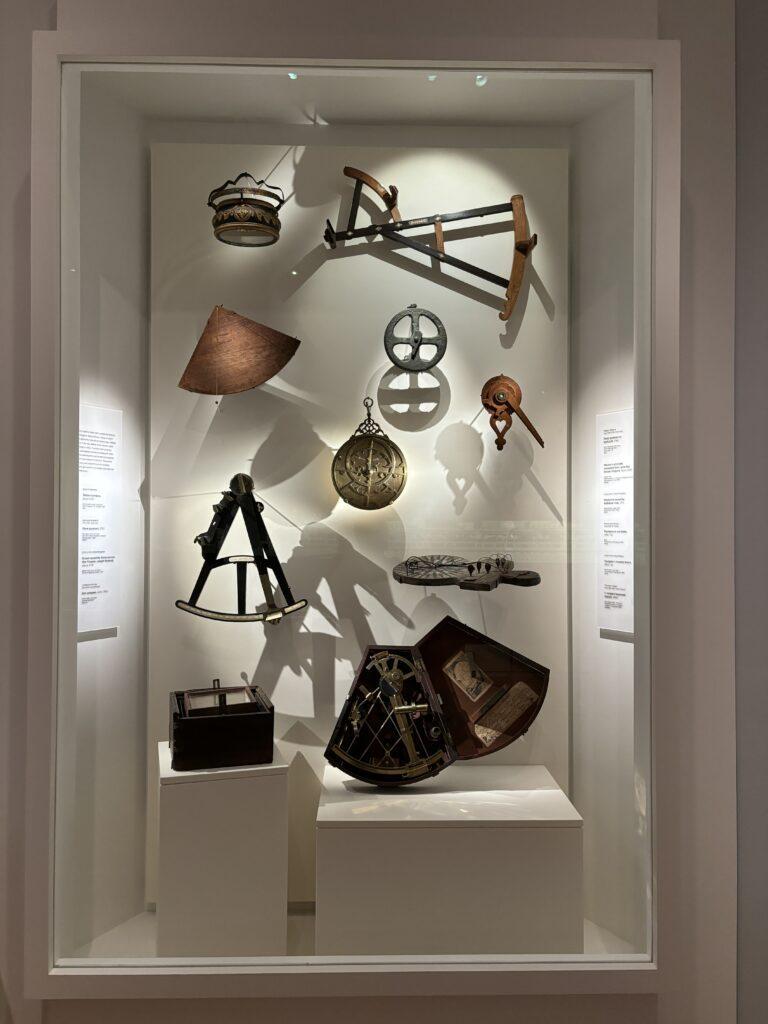
Left: Booklet mount for ED RUSCHA / NOW THEN, The Museum of Modern Art, Sep 10, 2023–Jan 13, 2024.
Center: Tail end of a Barosaurus, the world’s tallest freestanding dinosaur mount, American Museum on Natural History, 2024.
Right: Navigational instruments in the Maritime Art Galleries, Peabody Essex Museum, 2024.
Now that my role at the South Street Seaport Museum has me working closely with mount makers for loans, exhibition planning, and object storage I find myself more drawn to looking at the support system behind the artifact.
Before moving directly into how a mount is made, it is important to distinguish the two basic types of museum mounts. First, are those that are designed specifically for individual objects catering to the object’s material(s), size, and needs for stabilization and visibility. Second, are the mass produced mounts, such as Plexiglass shelving, that are made to accommodate standard collection types.
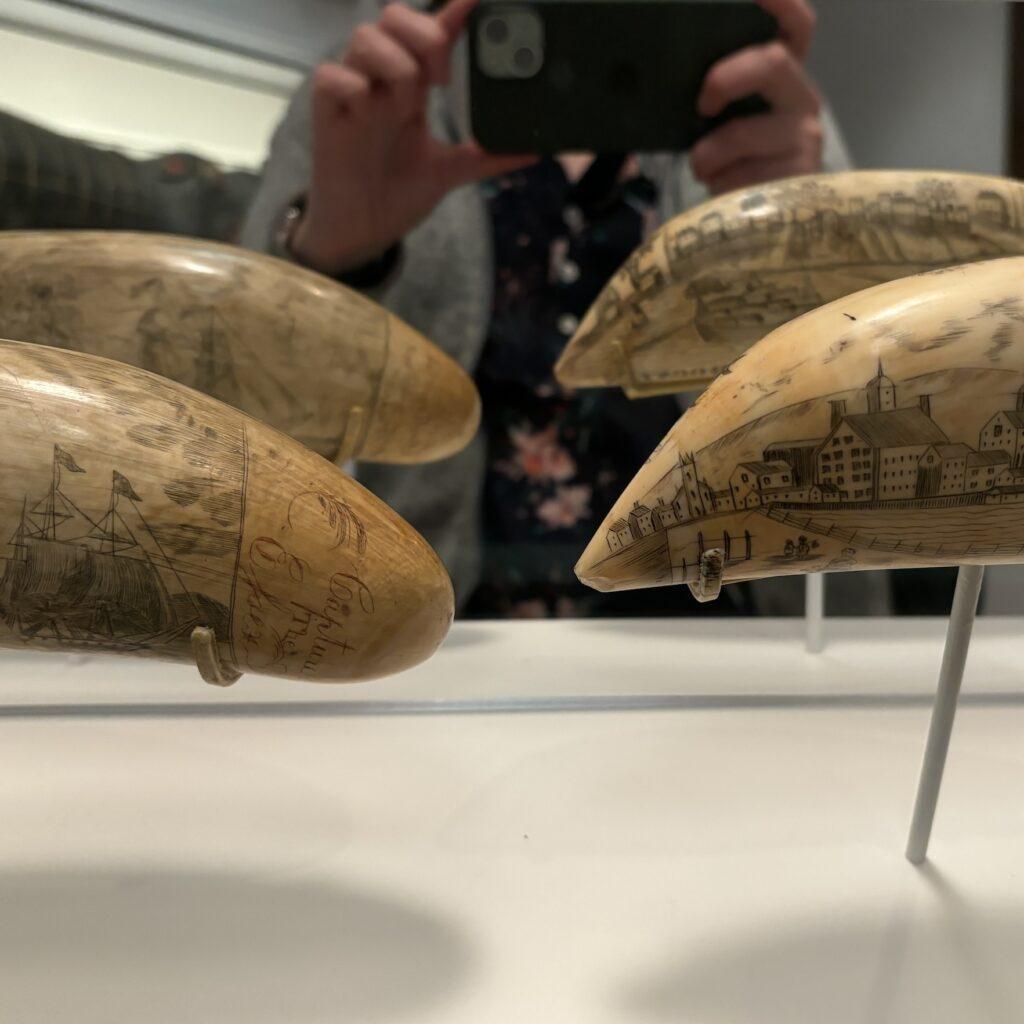
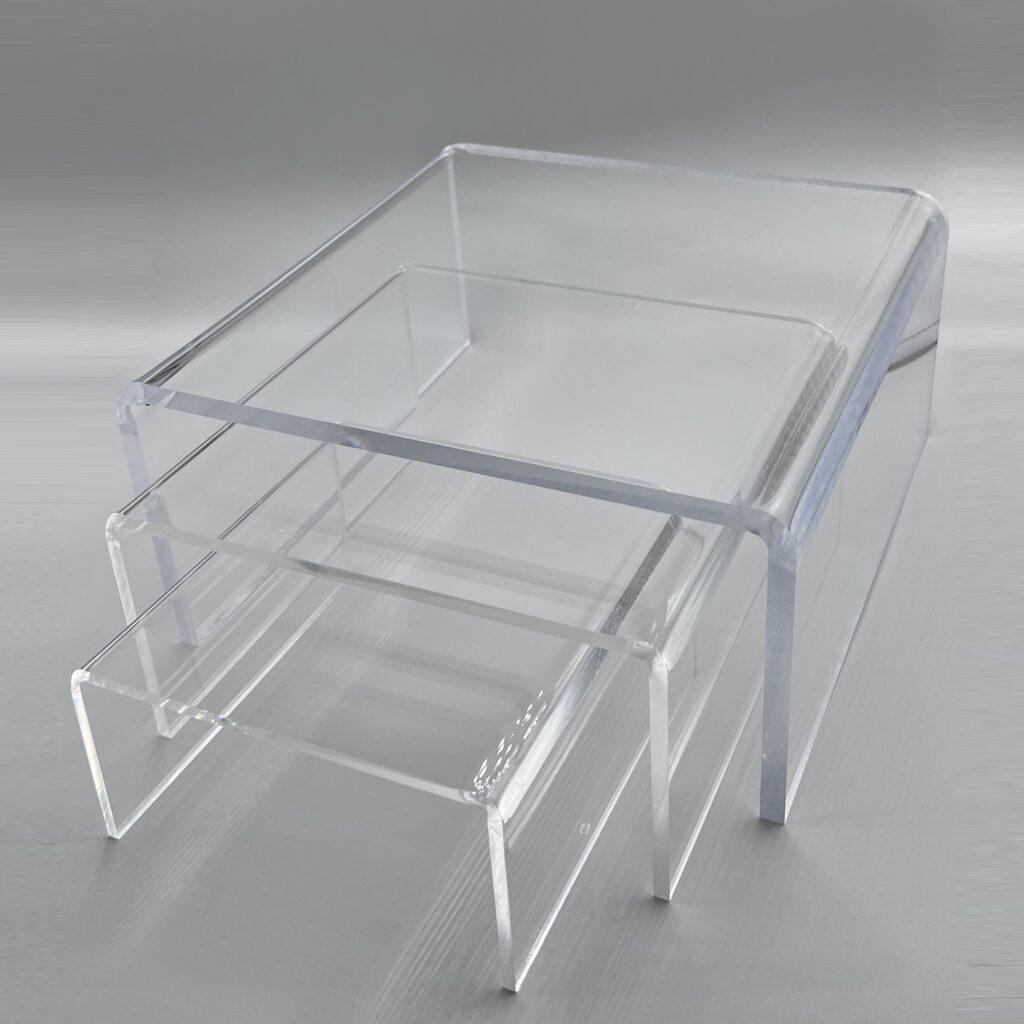
In this blog post, I will be focusing on the first mount type as they can be as unique, fascinating, and artistic as the object itself. Individualized mounts can range from massive steel structures for oversized objects to mat board cutouts for small ephemera. No matter the size or material of the mount, the design comes from the mountmaker who is integral in ensuring the safety of artifacts for both display and storage purposes. Mountmakers take their time to understand the specific needs of an object and the environment it will be in, as well as whether it will be in a public display case or on storage shelves. There is no formal educational program to become a mountmaker, but generally these creators have a Masters of Fine Arts and take on apprenticeships to learn about this exciting and artistic role.
Templating
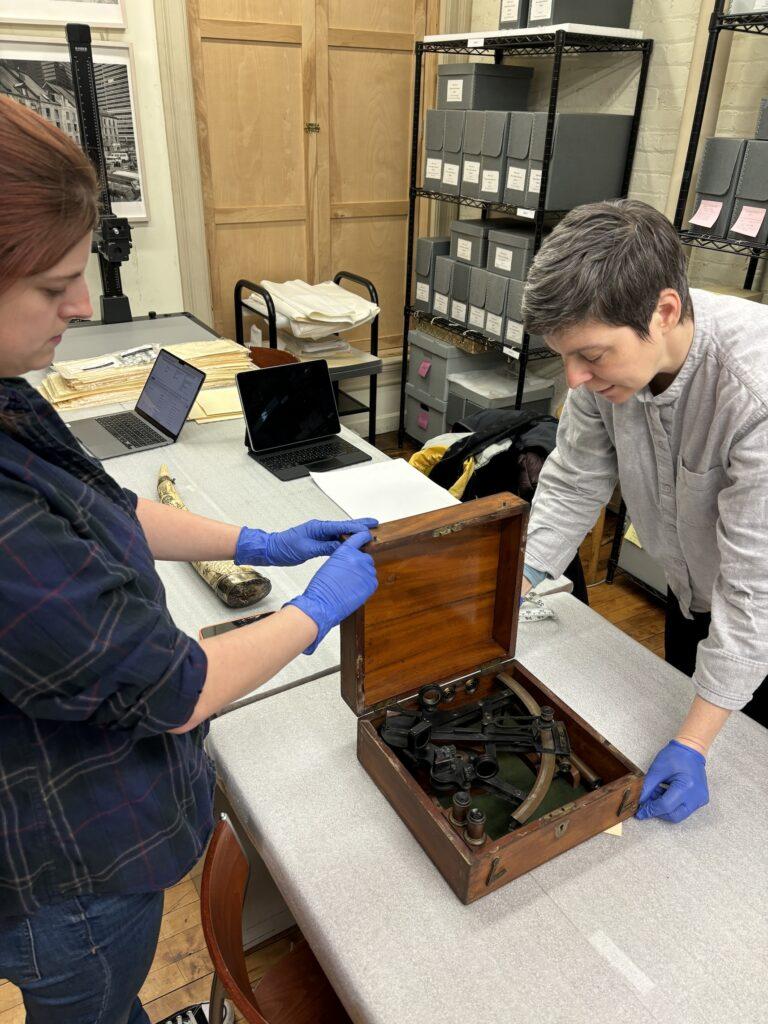
Mount making begins the same way as most projects: starting at the drawing board. Called templating, this is when a mountmaker speaks with a collection manager, registrar, and/or curator while looking at an object. In these first meetings, object caretakers communicate to the mountmaker any known structural needs of an object, what it is made of, and where the mounted object will be placed. Here at the Seaport Museum, we have been working with Beth Brideau of Object Mounts for many years. She uses her 15+ years of experience to talk through design ideas to consider opportunities of display with related safety and risk involved. Templating involves the mountmaker getting a literal feel for the object by assessing its weight, dimensions, and stability points.
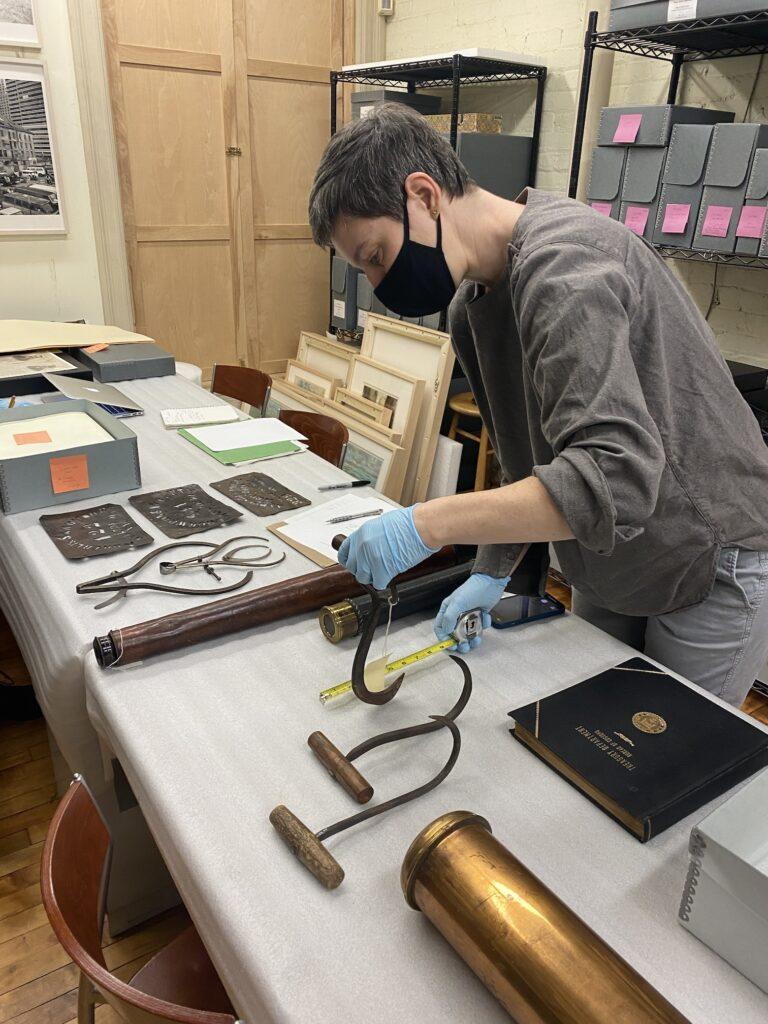
From here, the mountmaker can begin sketching out a design plan. These drawings hold notes for the mountmaker on where the support pieces should be to distribute the object’s weight evenly, to minimize movement, and generally to safeguard the object while maximizing visibility. At its most basic function, a mount is created as the first safety defense for an artifact to protect it from vibrations and theft. What will protect one item from moving in its case or on a shelf will not work for another, so it is important that we clearly communicate with each other the object’s needs in this first step to ensure the safety of each object.
In some cases, it is important to bring in an expert on a particular object, so the mountmaker can have a better understanding of how it was once used in order to display it properly. I do not have a maritime background, so there are some tools and instruments that I cannot confidently speak on past their basic physical characteristics. In preparation for a sextant that is now on loan at the New York Public Library (NYPL) for The Awe of the Arctic: A Visual History I asked Malcolm Martin, the Museum’s Fleet Captain and Master, to join Beth and I in our meeting on the sextant’s mount so he could give his expert advice on the functions of this navigational instrument. Malcolm’s advice and information allowed Beth to create a brass support that holds the object in three distinct places while allowing the sextant’s attachments to be seen clearly.
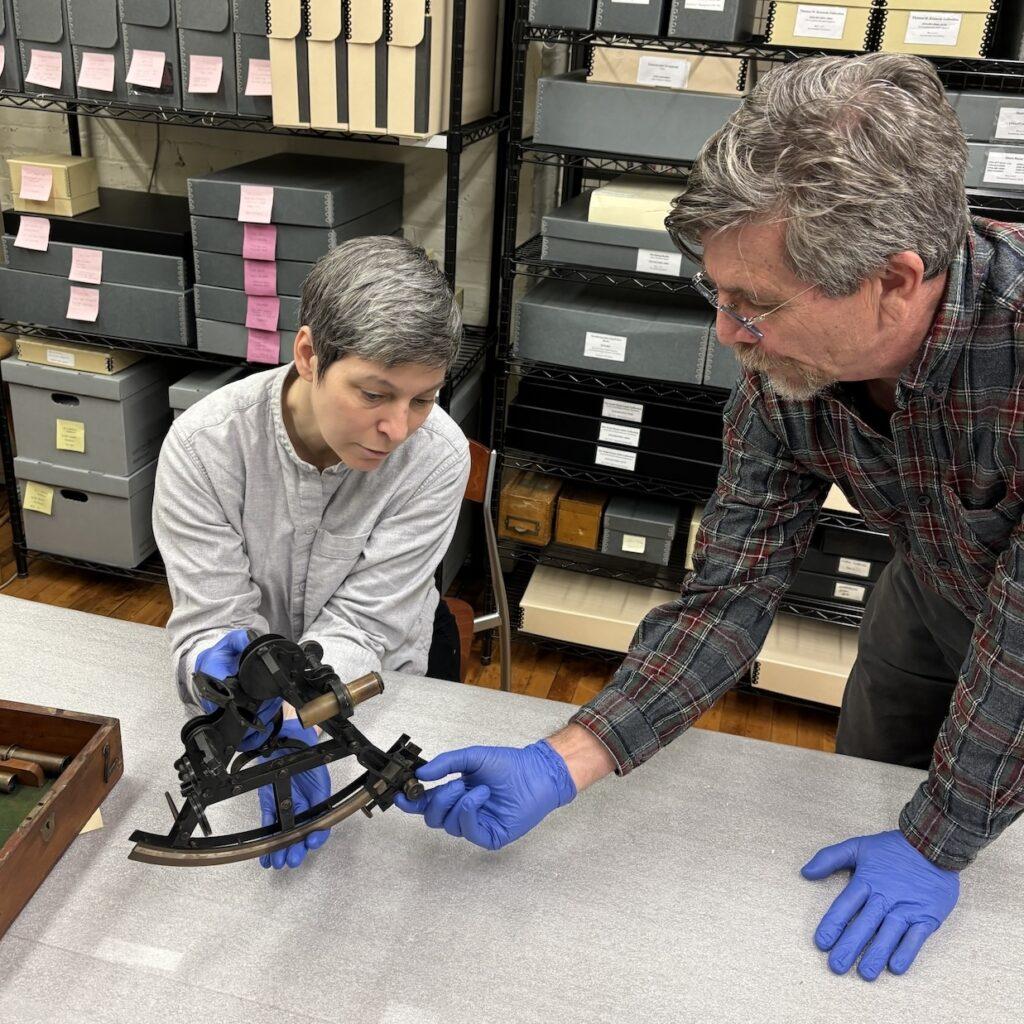
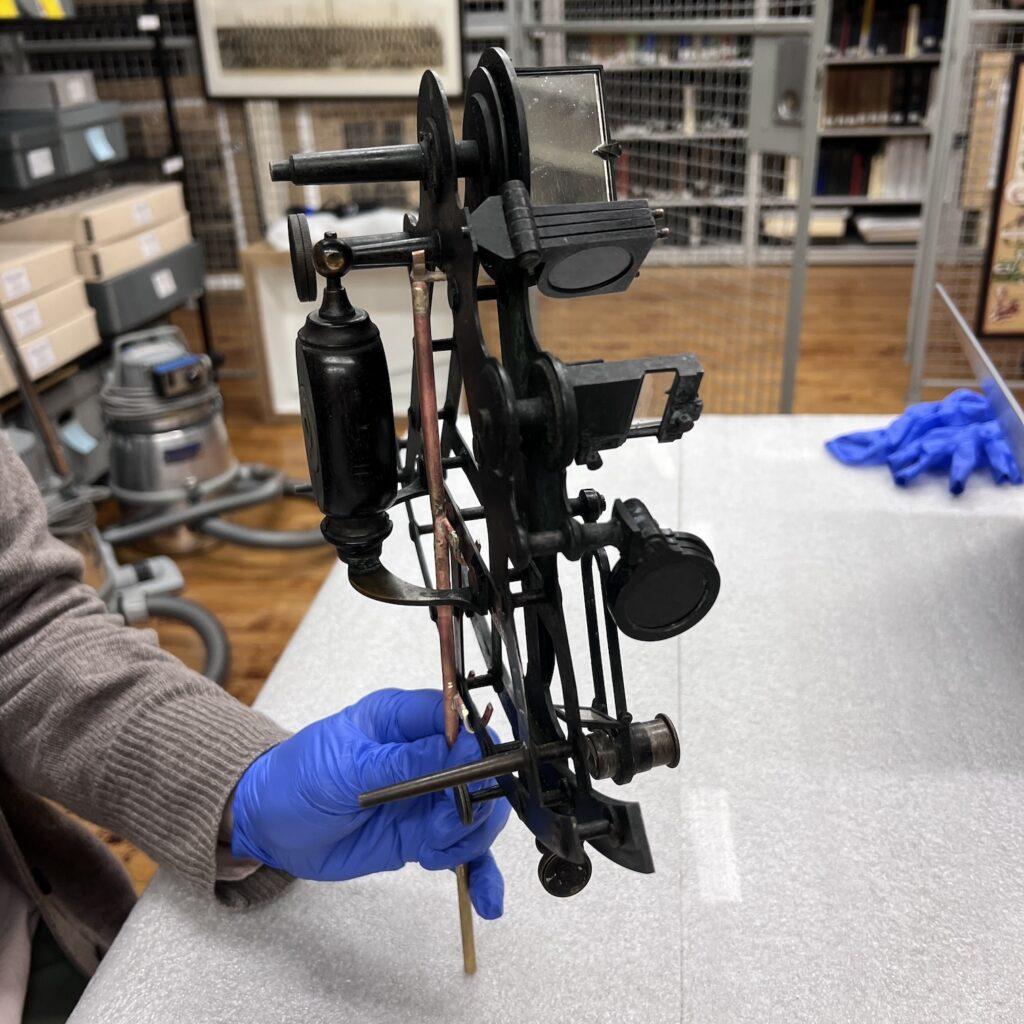
As a singular object with only a square even case as an added component, the sextant discussions still required weeks of emails and on-site visits with our mountmaker to ensure its safety while on display at NYPL. If you find yourself around NYPL’s Stephen A. Schwarzman Building at 42nd Street, go check them out! The exhibition includes two loaned objects from our collection and it will be open through July 13, 2024.
But what about more complicated objects with multiple components? For example, this tool box with an assortment of tools inside is an item that would be more exciting in a dynamic and active display. With an interest in gaining more knowledge and experience in exhibition planning, I thought it would be a good exercise to plan out how this object and its various pieces could be put on view. After a quick discussion with Beth, we agreed that some of the tools could remain in the chest, while others could “pop out” of the chest by standing or leaning upwards; a few smaller ones could also be mounted above the chest to appear as if they are floating.
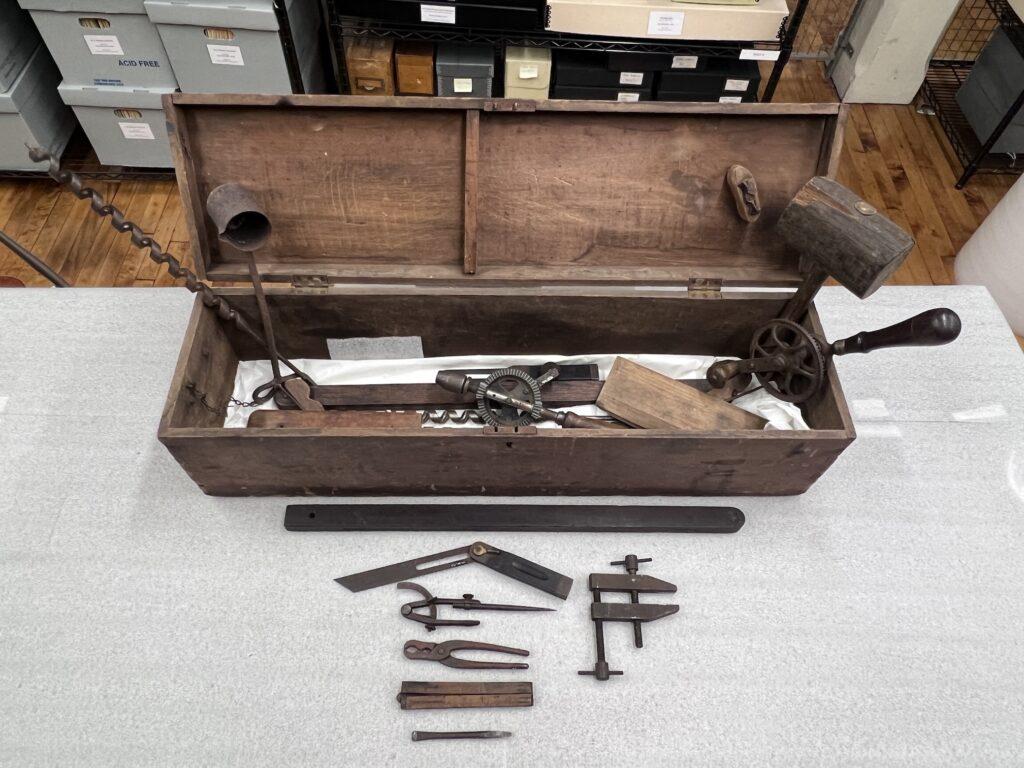
Toolbox, late 19th century-early 20th century. Gift of Patricia King Yatsyla, 1994.016.0001
To accomplish this, the tools were sorted according to the three categories based on size, stability, and noticeable interesting markings. The less stable tools were chosen to remain in the chest while larger tools were selected to appear as if coming out of it. Smaller tools that would have been hard to see in the chest and tools with initials or writing on them were placed in the floating pile. Although sorting objects into subcategories seems like a simple task, it is crucial to understand every component of an object and their individual characteristics to keep each item safe, ensure their continued long-term preservation even while displayed, and to help highlight the objects as individual pieces with their past use and historical interpretation components.
Fabrication
With templating discussions over, the mountmaker can move to fabrication. In this step, the mountmaker physically makes the supportive structure for an object. One of the most important aspects of this stage in the process is ensuring the materials selected for the mount will not only support and protect the object, but essentially be invisible to the exhibit guests.
Mounts can be made from a variety of materials such as brass, steel, acrylic (also known as plexi), wood, polyethylene foam, and mat boards. In order to protect the object and any surrounding objects nearby, it is important to understand the chemical properties of both the mount and the object to prevent damages. For example, organic materials like wood are known to off-gas acidic and corrosive vapors over time that are harmful to many objects with some woods, like oak, having particularly high levels of off-gassing. Modern mountmakers and conservators have extensive knowledge of material compositions based on their own experiences as well as decades of case studies and research experiments. While the look of an exhibition is important the safety of an object overrides any aesthetic choices.
Fitting
The first version of the mount has been made after selecting the materials that are best suited for each object. Similar to a rough draft, the structure is physically there, but there are still some details that need to be finalized. At this point the mountmaker returns to the museum to place the object on the mount—a step known as fitting.
The mountmaker works once again with a collection manager or a registrar to ensure that the artifact is safe within the crafted mount.
Does the mount fully support the weight of the object? Are the fragile components of an artifact fully protected? Are the measurements correct? The fitting answers the questions that will lead to finishing the mount.
During the fitting it can also be decided if the mounts will be customized so they blend in with the object or the exhibition design.
Doing so allows visitors to seamlessly enjoy the exhibit without being distracted by the nuts and bolts of the show. This can be done several ways such as painting over brass with acrylic paint, selecting a base material of varying opaqueness levels, or using non-toxic fabric to wrap around the mount and its fixtures.
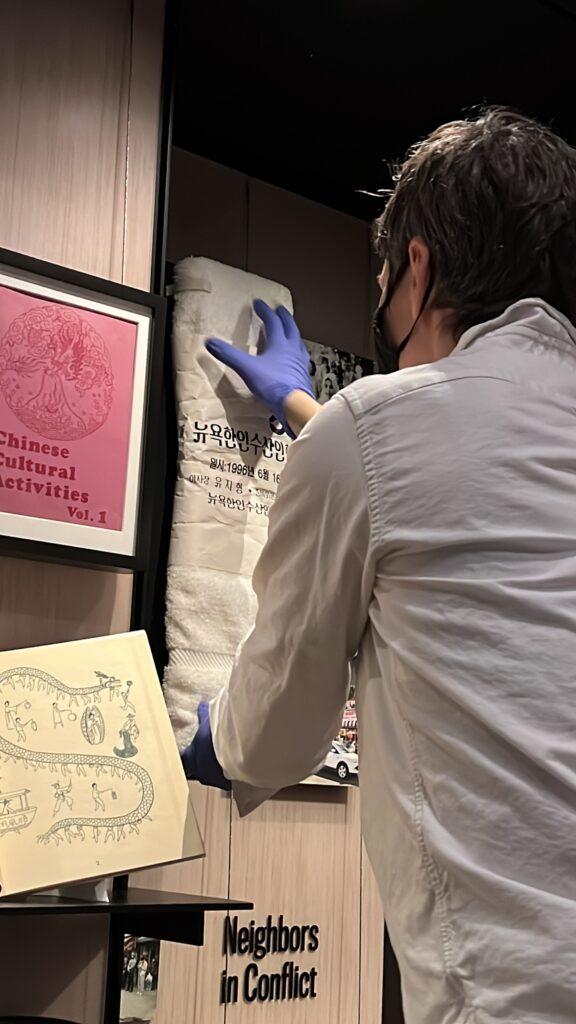
This last example can be seen with one of the Museum’s loaned object on view in NY at its Core: 400 Years of NYC History at the Museum of the City of New York.
Above: “New York Korean Fishery Association Summer Picnic Souvenir Towel” 1996. Gift of the Korean Seafood Association of New York, Inc., 1996.026.0003
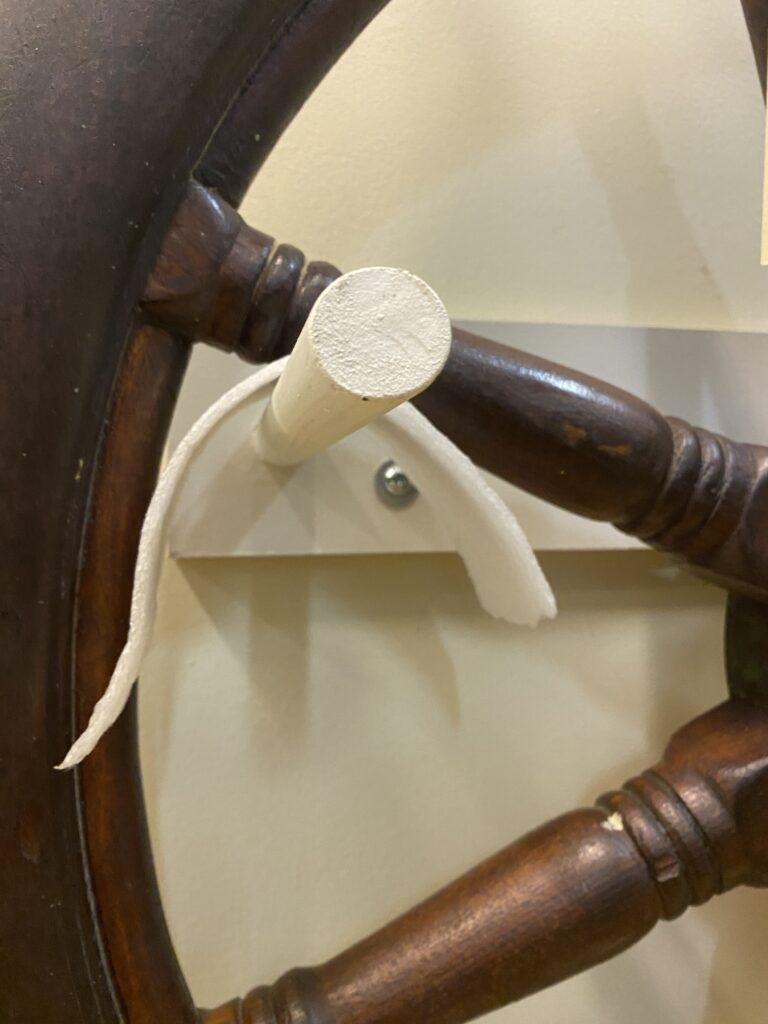
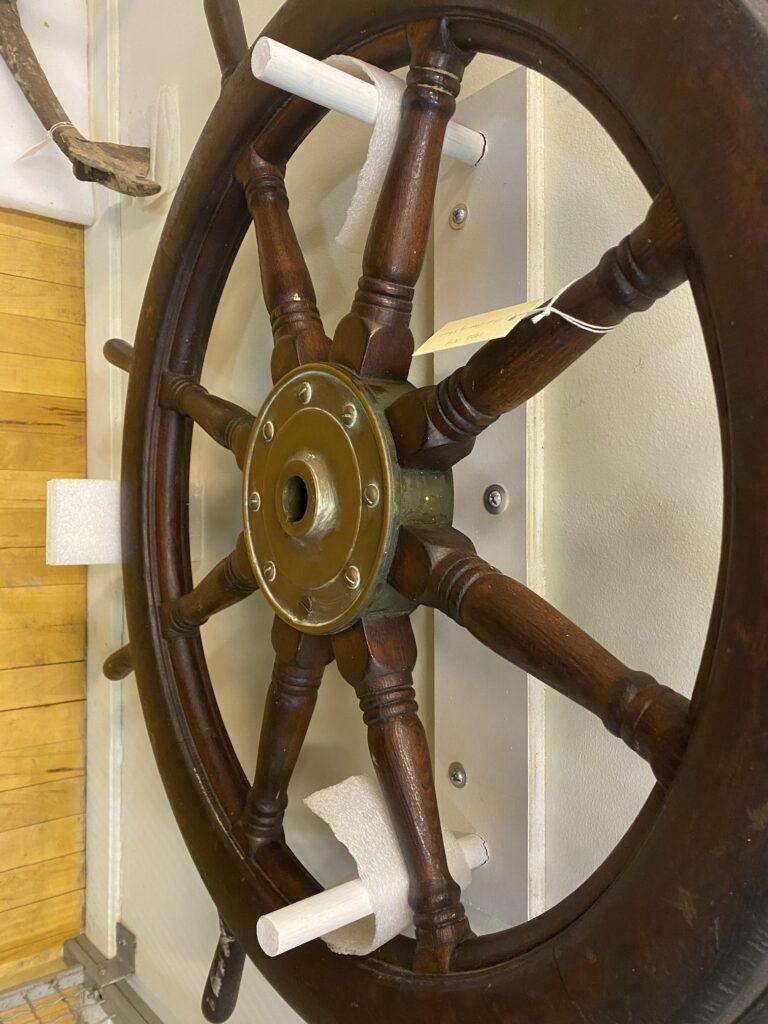
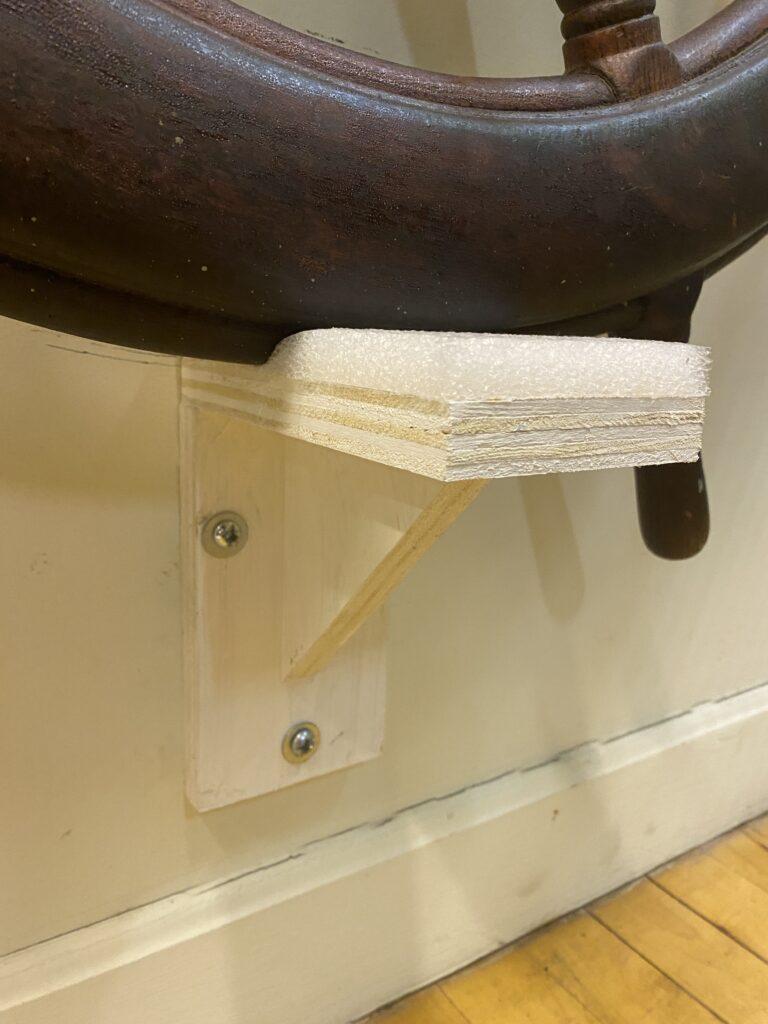
For mounts in storage, the need for seamless disappearance does not matter as much. For example, these ships’ wheels are mounted on the wall for their safety and visibility while in a small space. While the mounts are painted to blend in with the wall, the screws and foam are visible. For the staff that see these objects in storage, it is more important to see the objects are supported and protected rather than focusing on making an invisible mount.
Flatworks
The mount making process described so far has been focused on 3D artifacts. Flatworks such as prints, drawings, watercolors, newspaper clippings, and ephemeral objects ask slightly different questions in the templating process. Will the 2D work be encased and held up so both sides of the object can be easily seen? Will these pieces be displayed in a way so only the recto (or front) can be seen? Will it be hanging up or laid down? Will it be framed? Once again the importance of clear communication between the collections staff, curator, and mount maker cannot be understated to guarantee the objects are safe and presented as desired.
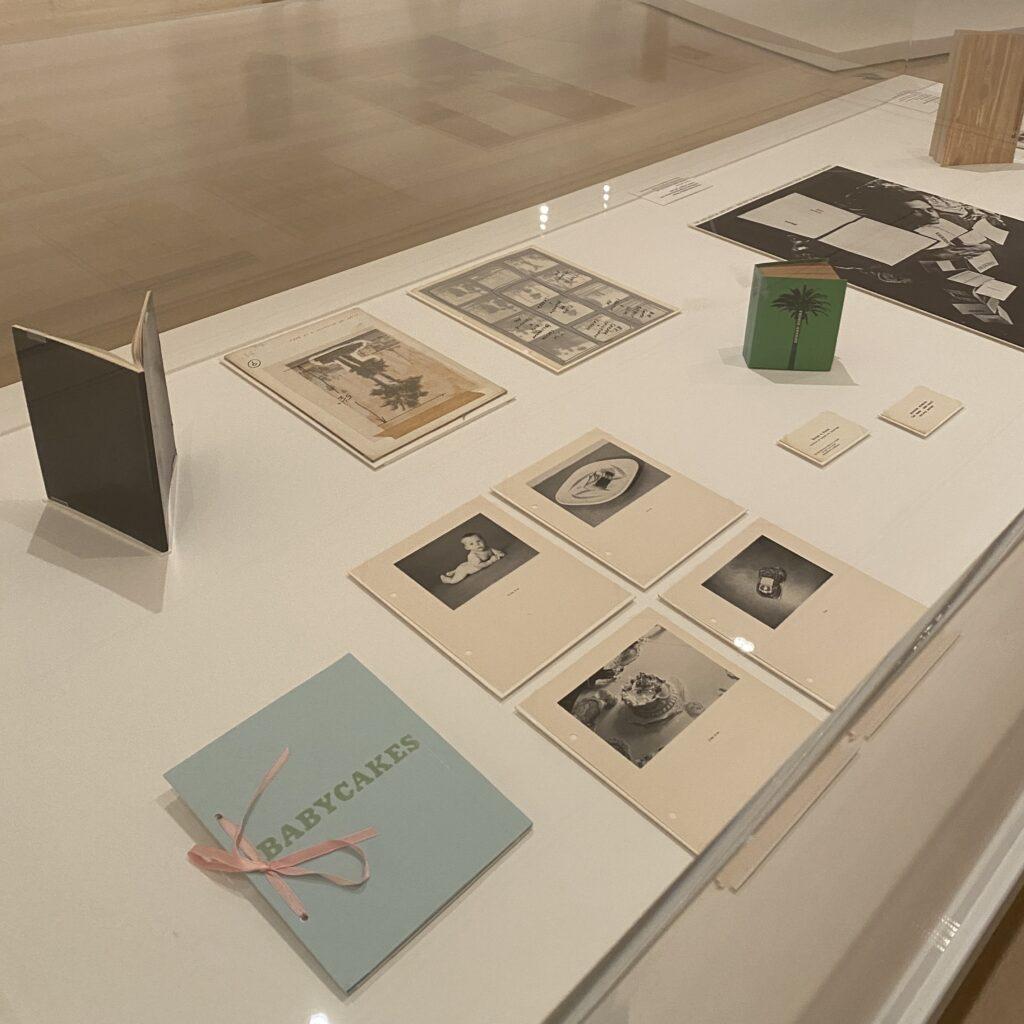
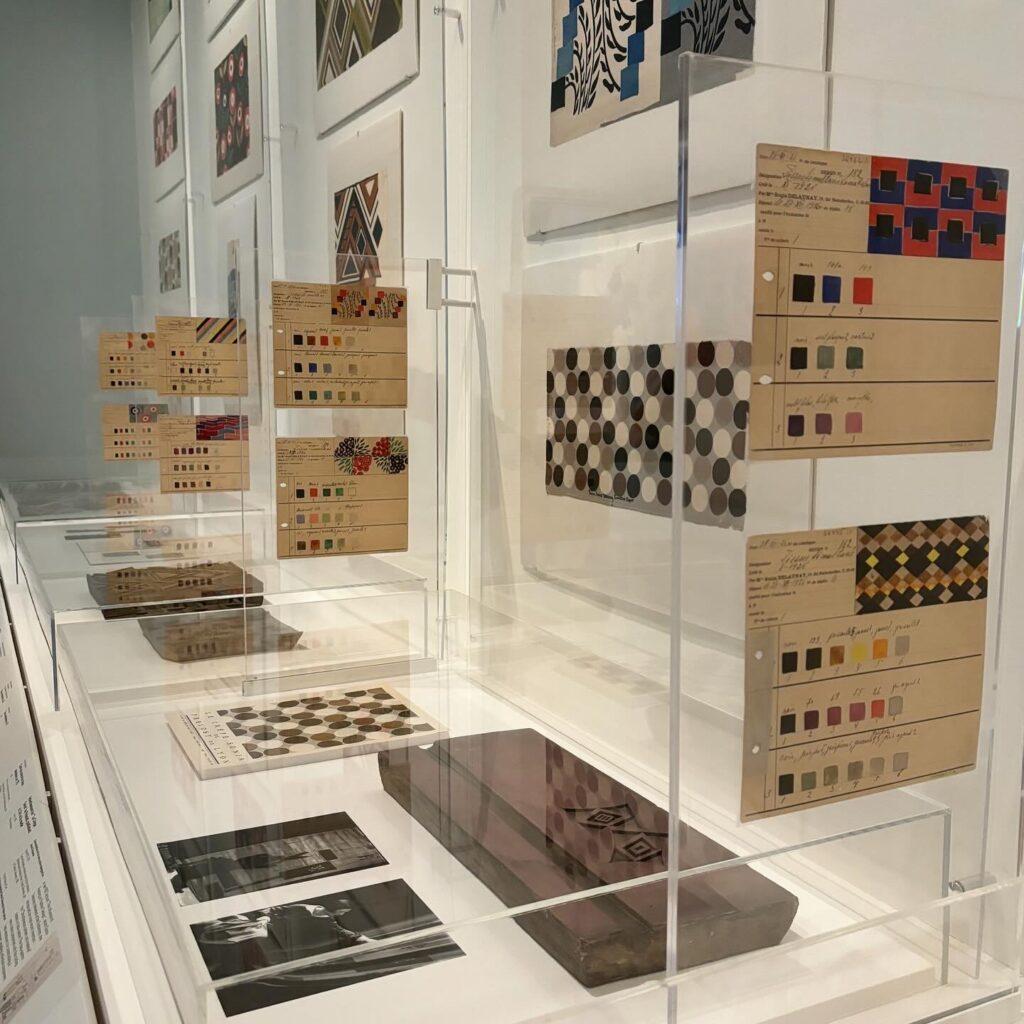
Left: A view of artist booklets display for ED RUSCHA / NOW THEN, The Museum of Modern Art, Sep 10, 2023–Jan 13, 2024.
Right: A view of carte de coloris for tissu as part of Sonia Delaunay: Living Art at Bard Graduate Center, Feb 23–July 7, 2024.
Once the design is settled the mounts can be fabricated. I recently had the opportunity to learn a technique known as strapping to keep paper works secured to a matboard. Also called a mat, this is a sturdy cardboard-like material that adds extra support to flatworks whether they are hanging up or laying down. The size of the mat needs to be decided first and for this project we chose a small border to allow the object stability without being consumed by the mat. Next the mat is cut to the desired length and the 2D artifact is placed on top. Gently place paperweights on the artifact so it does not move and now the strapping process can begin.
Using polyethylene book straps (chemically stable plastic that is trusted across cultural institutions) secure a piece of it around one corner of the object. It is best to have this corner moved slightly off the edge of your workstation so you can easily feel the underside of the mat. Using clear adhesive tape, J-Lar is preferred as it is less off-gassy than others, secure one end of the strap to the back of the mat. Take the other end of the strap and pull it over the corner of the object so that it is secure, but not tight enough to tear or damage the paper, to adhere the other end of the strap just as you did with the first. Protect the corner with a spare piece of matboard to smooth the strap down.
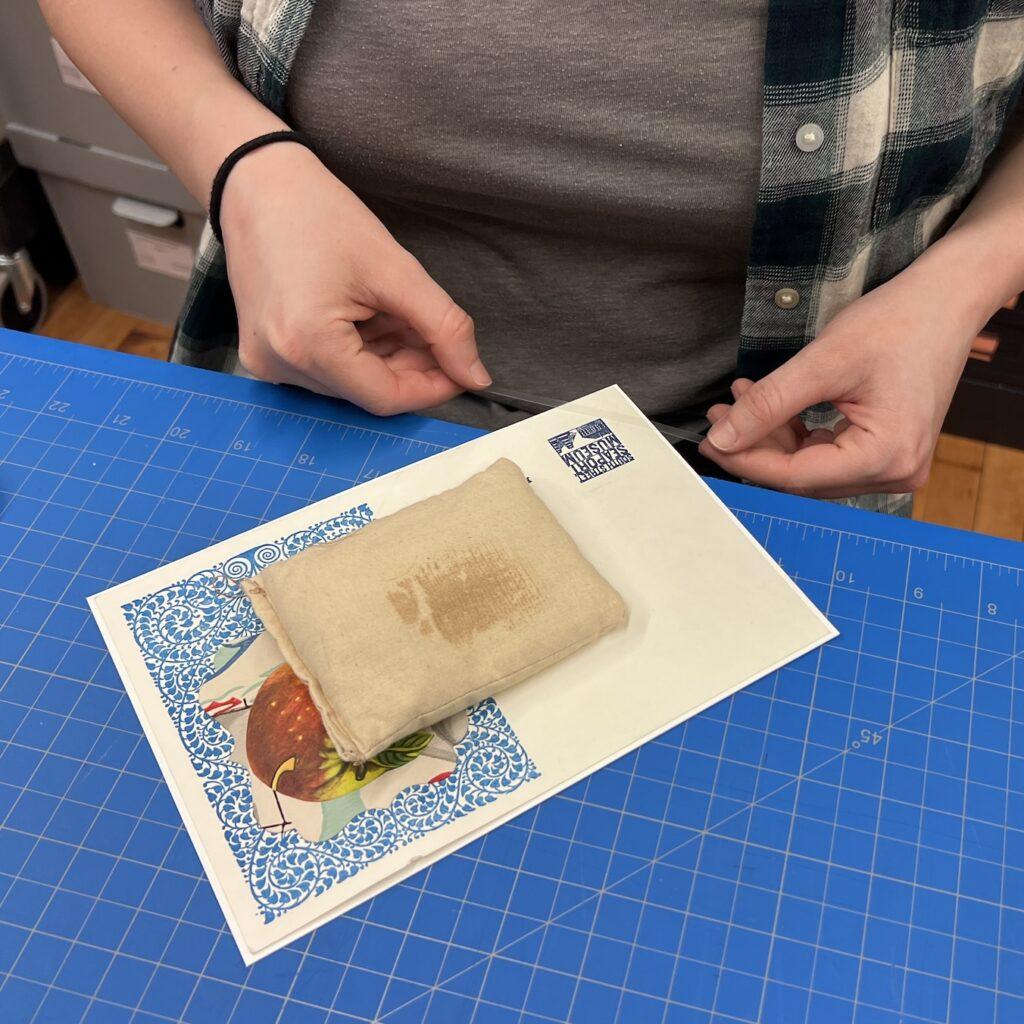
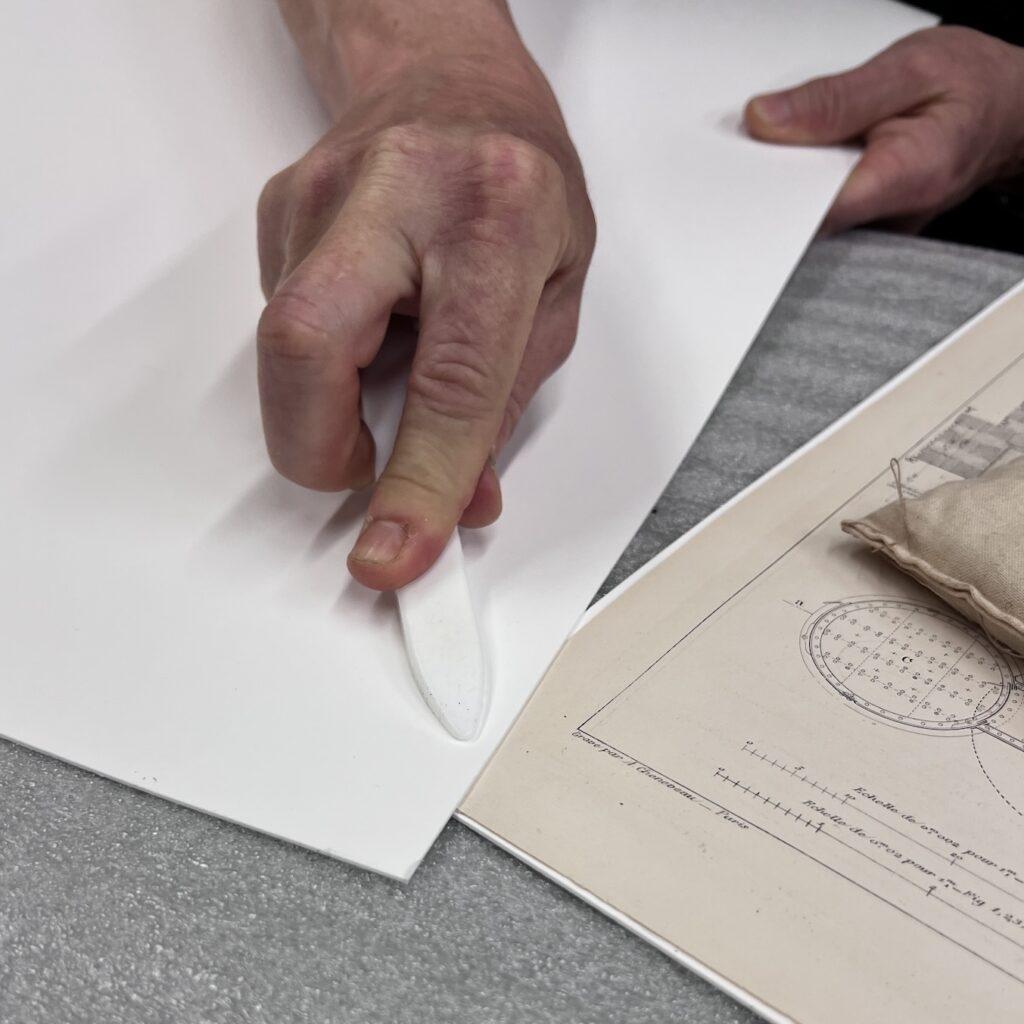
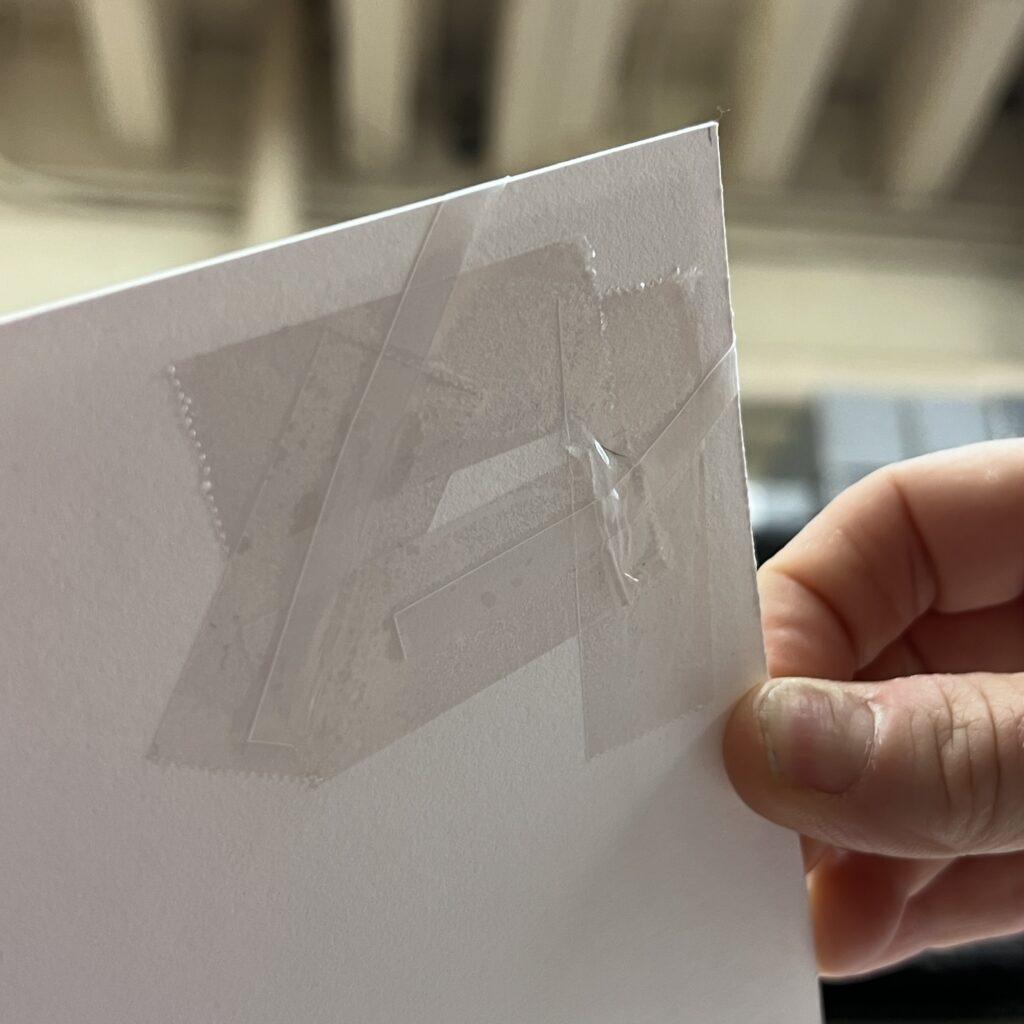
With all four corners secured, check the back of the matboard. Using a spare matboard again place it on the face of the object and flip the mount over. Now you can see all the tape on the back side. Place more down for extra protection and use the burnishing tool to smooth everything down. Since this side of the matboard isn’t going to be seen by the public, it does not need to look great, it just needs to keep everything in place.
Installation
After weeks of discussions, fabrication, more discussions, and final touch ups the mount is finally completed and ready for installation. Whether in storage or for an exhibition, the mountmaker and the collection manager or registrar should be available during this step. If the object is oversized or extremely heavy, professional art handlers should be on hand as well. All work together to ensure the mounts and objects are secured to prevent possible damages during the installation process and afterwards.
Mounts can be secured in casework several ways during installation. For complicated mounts or objects that need extra support, hardware can be drilled directly into the wall case or pedestals. The use of museum wax, putty, and gel is common to prevent slippage and these materials are easily removable without causing damage to objects.
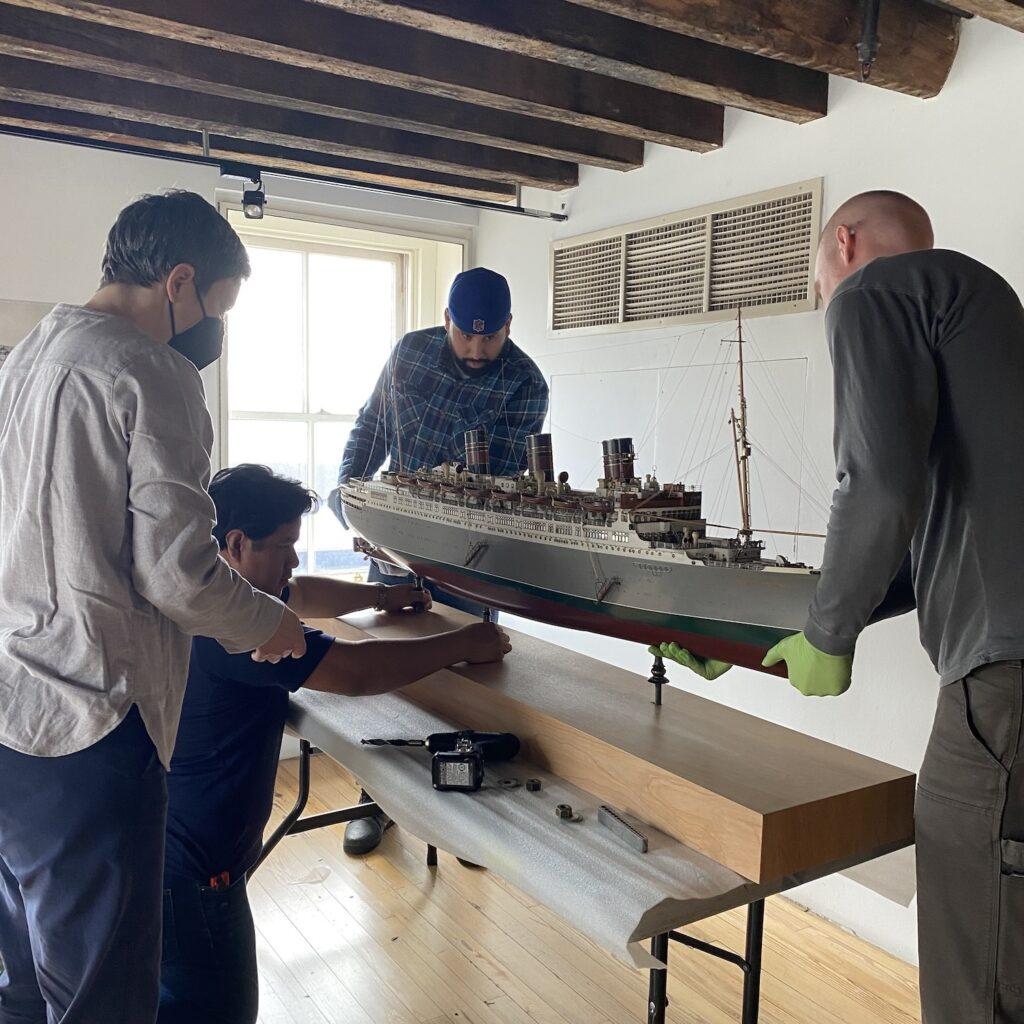
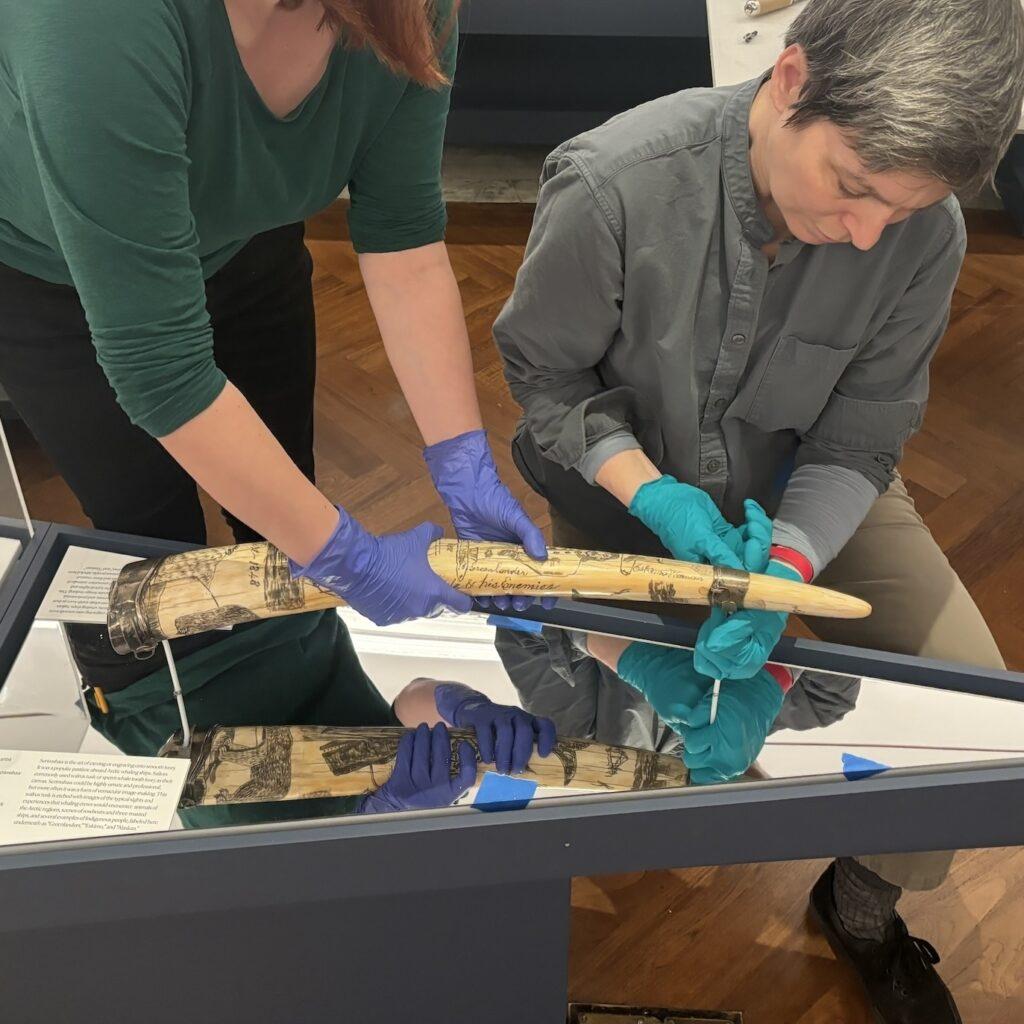
It can be daunting to let go of an object for the last time as you step back after installation. This moment is the culmination of so much time, resources, and creativity to see the final product. Or in the case of mounts, to not see the product.
So the next time you are walking around a gallery or you find yourself eating in a restaurant, take a moment to appreciate the hard work going unnoticed in the background. The silent and unseen support allows visitors of all types to fully enjoy the moment.
Resources and further readings
“About Time: Fashion and Invisible Mount-Making” by Joyce Fung. The Met Museum, February 2, 2021.
“Basic Mountmaking Tools and Techniques” International Mountmakers Forum, 2024.
“Category: Exhibition Fabrication” American Institute for Conservation. August 12, 2020.
“Hiding in plain sight: The secret life of a mount maker” by Maude Willaerts. The Victoria & Albert Museum, August 4, 2021.
Mountmaking: Materials Selection for Object Safety and Practicality. (Video) International Mountmakers Forum. May 4, 2016.
“Short Communication: Exploring Process and Design for Visually Unobtrusive Object Mounts.” by McKenzie Lowry. Journal of the American Institute for Conservation, 2012.
What Your Mountmaking Mama Never Told You. (Video) International Mountmakers Forum. February 1, 2021.
